Modern Wainscoting & Wall Molding: Height, Spacing & Styles That Look Right
Wainscoting is the fastest way to make a plain room look finished. It is also the fastest way to make it look wrong. The wrong height makes the ceiling look lower, while improper panel spacing creates visual clutter. Once boards are glued and nailed, fixing errors requires major drywall patching.
Quick summary:
| Rule | What to do |
|---|---|
| Height | One third of wall height. 8 ft ceiling means 32 to 36 inches |
| Never halfway | 48 inches on a 96 inch wall cuts the room in half |
| Panel width | Mostly 24 to 35 inches wide. Gaps 3 to 4 inches |
| Best style for modern rooms | Flat Shaker or board and batten |
| Paint | Satin finish. Same colour as the wall, or one shade deeper |
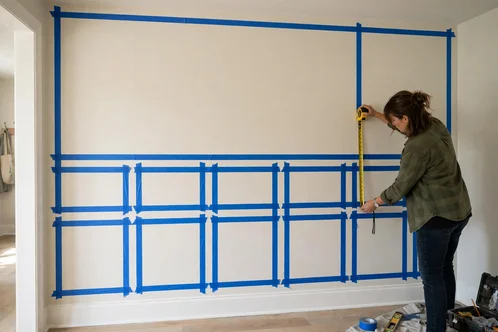
| Before you buy | Draw it on paper, then tape it on the wall |

How High Should Wainscoting Be? //
Proportion is everything when installing wall trim. Follow these precise height rules based on your room dimensions:
- The One-Third Rule: Divide your overall ceiling height by three to determine your top rail height. For an 8 ft ceiling, aim for 32 to 36 inches; a 9 ft ceiling takes 36 to 42 inches, while a 10 ft ceiling uses 40 to 48 inches.
- Avoid the Halfway Cut: Never install chair rails at exactly 48 inches on an 8 ft wall. Cutting the wall in half visually lowers the ceiling height and makes furniture look dwarfed.
- Finished Floor Measurement: Always measure upward from the finished flooring. The total height calculation includes baseboards, vertical battens, and the top cap rail.
Panel Width and Spacing Math //
Getting your panel grid symmetrical makes the difference between a custom builder finish and a DIY attempt:
- Panel Dimensions: Keep main panels between 24 and 35 inches wide. Wider panels look high-end, whereas too many narrow panels look busy.
- Spacing & Margins: Maintain 3 to 4-inch gaps between panel frames, and leave 4 to 8 inches of margin at wall corners and door casings.
- Individual Wall Framing: Treat each wall section as its own centered composition rather than forcing a single continuous panel width around the entire room.
5 Popular Molding Styles Compared //
Selecting the right molding profile ensures your wall detail matches the architectural style of your home:
| Style | Best for | Approx. Install Cost |
|---|---|---|
| Board and Batten | Modern, farmhouse, clean modern lines | $7 to $12 per foot |
| Picture Frame Molding | Formal dining rooms, classic entryways | $5 to $10 per foot |
| Flat Shaker | Minimalist modern interiors | $10 to $18 per foot |
| Beadboard | Cottages, powder rooms (use PVC for moisture) | $6 to $12 per foot |
| Raised Panel | Traditional formal estates | $15 to $25 per foot |
Which Room Gets Which Style? //
- Living Room: Opt for clean board and batten or flat Shaker trim at one-third height, painted in your main wall tone for a seamless look.
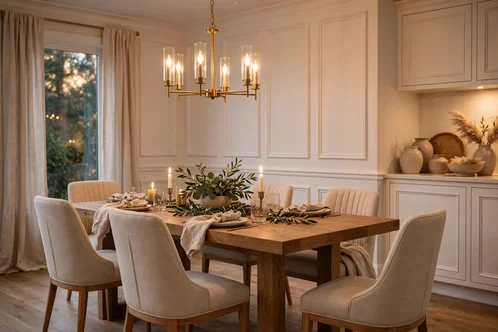
- Dining Room: Picture frame molding at one-third or dramatic two-thirds height adds refined formal texture.
- Bedroom: Use full-height Shaker panels behind the bed headboard wall to create an architectural focal point.
- Bathroom: Use moisture-resistant PVC beadboard or composite trim to prevent swelling and mildew.

Budget & Material Breakdown //
Price guidelines for common wall molding materials:
| Material | Approx. Material Cost |
|---|---|
| MDF (Medium-Density Fiberboard) | About $2 to $4 per foot |
| Pine or Poplar Wood | About $3 to $6 per foot |
| PVC (Waterproof) | About $5 to $9 per foot |
| Hardwood (Oak/Maple) | About $6 to $12 per foot |
*Note: Prices listed above are estimated approximations and may vary based on market fluctuations, regional supply, or contractor installation fees. Always check live local prices before ordering supplies.
5 Mistakes to Avoid //
- Incorrect Height Calculations: Cutting walls directly in half with a 48-inch chair rail.
- Ignoring Electrical Outlets: Failing to adjust panel layouts so switch plates land awkwardly over molding edges.
- Puny Baseboard Trim: Pairing bold wainscoting panels with thin, builder-grade 3-inch baseboards.
- Fastening Only to Drywall: Skipping stud locations and relying solely on adhesive or drywall nails.
- Using Unprimed MDF in Damp Spaces: Installing raw fiberboard in bathrooms where humidity causes edges to swell.
Where to Start //
Begin by choosing a single accent wall, such as your entryway or dining room focal wall. Outline your panel grid using painter’s tape, verify stud locations, and live with the taped proportions for 24 hours before making your first cut.